Showing posts with label Tutorial Blog. Show all posts

Monday, November 2, 2009

Revision of how to create a "Back to Top"

I've discussed how step by step to make jQuery Scroll to Top Control, but scrolltopcontrol-1.js files I save on www.geocities.com. Because www.geocities.com currently does not serve file storage for free, then automatically there are tutorials that do not work here anymore. For that, I tried to change the tutorial is on the current post.

Add this code above the code </ head>

<script src='http://ajax.googleapis.com/ajax/libs/jquery/1.3.2/jquery.min.js' type='text/javascript'/>

/***********************************************
* Scroll To Top Control script- &#169; Dynamic Drive DHTML code library (www.dynamicdrive.com)
* This notice MUST stay intact for legal use
* Visit Project Page at http://www.dynamicdrive.com for full source code
***********************************************/

</script>

<script type='text/javascript'>
//<![CDATA[

var scrolltotop={
//startline: Integer. Number of pixels from top of doc scrollbar is scrolled before showing control
//scrollto: Keyword (Integer, or "Scroll_to_Element_ID"). How far to scroll document up when control is clicked on (0=top).
setting: {startline:100, scrollto: 0, scrollduration:1000, fadeduration:[500, 100]},
controlHTML: '<img src="http://i288.photobucket.com/albums/ll179/ahnning/up.png" style="width:48px; height:48px" />', //HTML for control, which is auto wrapped in DIV w/ ID="topcontrol"
controlattrs: {offsetx:5, offsety:5}, //offset of control relative to right/ bottom of window corner
anchorkeyword: '#top', //Enter href value of HTML anchors on the page that should also act as "Scroll Up" links

state: {isvisible:false, shouldvisible:false},

scrollup:function(){
if (!this.cssfixedsupport) //if control is positioned using JavaScript
this.$control.css({opacity:0}) //hide control immediately after clicking it
var dest=isNaN(this.setting.scrollto)? this.setting.scrollto : parseInt(this.setting.scrollto)
if (typeof dest=="string" && jQuery('#'+dest).length==1) //check element set by string exists
dest=jQuery('#'+dest).offset().top
else
dest=0
this.$body.animate({scrollTop: dest}, this.setting.scrollduration);
},

keepfixed:function(){
var $window=jQuery(window)
var controlx=$window.scrollLeft() + $window.width() - this.$control.width() - this.controlattrs.offsetx
var controly=$window.scrollTop() + $window.height() - this.$control.height() - this.controlattrs.offsety
this.$control.css({left:controlx+'px', top:controly+'px'})
},

togglecontrol:function(){
var scrolltop=jQuery(window).scrollTop()
if (!this.cssfixedsupport)
this.keepfixed()
this.state.shouldvisible=(scrolltop>=this.setting.startline)? true : false
if (this.state.shouldvisible && !this.state.isvisible){
this.$control.stop().animate({opacity:1}, this.setting.fadeduration[0])
this.state.isvisible=true
}
else if (this.state.shouldvisible==false && this.state.isvisible){
this.$control.stop().animate({opacity:0}, this.setting.fadeduration[1])
this.state.isvisible=false
}
},

init:function(){
jQuery(document).ready(function($){
var mainobj=scrolltotop
var iebrws=document.all
mainobj.cssfixedsupport=!iebrws || iebrws && document.compatMode=="CSS1Compat" && window.XMLHttpRequest //not IE or IE7+ browsers in standards mode
mainobj.$body=(window.opera)? (document.compatMode=="CSS1Compat"? $('html') : $('body')) : $('html,body')
mainobj.$control=$('<div id="topcontrol">'+mainobj.controlHTML+'</div>')
.css({position:mainobj.cssfixedsupport? 'fixed' : 'absolute', bottom:mainobj.controlattrs.offsety, right:mainobj.controlattrs.offsetx, opacity:0, cursor:'pointer'})
.attr({title:'Scroll Back to Top'})
.click(function(){mainobj.scrollup(); return false})
.appendTo('body')
if (document.all && !window.XMLHttpRequest && mainobj.$control.text()!='') //loose check for IE6 and below, plus whether control contains any text
mainobj.$control.css({width:mainobj.$control.width()}) //IE6- seems to require an explicit width on a DIV containing text
mainobj.togglecontrol()
$('a[href="' + mainobj.anchorkeyword +'"]').click(function(){
mainobj.scrollup()
return false
})
$(window).bind('scroll resize', function(e){
mainobj.togglecontrol()
})
})
}
}

scrolltotop.init()

//]]>
</script>

If the addition of the code has not been successful, try to encode the above code, then repeat the process.

If you have a variety of images for the icon "back to Up" please change the URL in this code:

controlHTML: '<img src="http://i288.photobucket.com/albums/ll179/ahnning/up.png"

I hope this article is a revision that can help...... enjoy
»»  read more

Friday, July 31, 2009

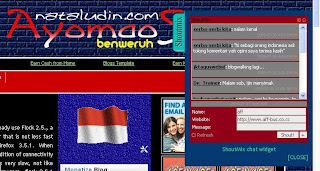
Make a widget is hidden

So that the space in the Sidebar of your blog does not seem dense, then needed Widget hidden in the sense that only appear in the title of the widget.

Here, I apply a widget to SHOUTMIX. However, this widget should not be applied to Shoutmix only.


Step by step how to create it, is as follows:

1. Log in to your Blogger account, select "Layout" then "Page Elements",

2. Click the "Add a Gadget", then select "HTML / JavaScript"

3. Add the code below:

<style type="text/css">
#gb{
position:fixed;
top:50px;
z-index:+1000;
}
* html #gb{position:relative;}

.gbtab{
height:100px;
width:30px;
float:left;
cursor:pointer;
background:url('http://i288.photobucket.com/albums/ll179/ahnning/shoutmix.png') no-repeat;
}
.gbcontent{
float:left;
border:2px solid #A5BD51;
background:#F5F5F5;
padding:10px;
}
</style>

<script type="text/javascript">
function showHideGB(){
var gb = document.getElementById("gb");
var w = gb.offsetWidth;
gb.opened ? moveGB(0, 30-w) : moveGB(20-w, 0);
gb.opened = !gb.opened;
}
function moveGB(x0, xf){
var gb = document.getElementById("gb");
var dx = Math.abs(x0-xf) > 10 ? 5 : 1;
var dir = xf>x0 ? 1 : -1;
var x = x0 + dx * dir;
gb.style.right = x.toString() + "px";
if(x0!=xf){setTimeout("moveGB("+x+", "+xf+")", 10);}
}
</script>

<div id="gb">

<div class="gbtab" onclick="showHideGB()"> </div>

<div class="gbcontent">

<!-- Add the code SHOUTMIX or the other, here -->

<div style="text-align:right">
<a href="javascript:showHideGB()">
[CLOSE]
</a>
</div>

</div>

</div>

<script type="text/javascript">
var gb = document.getElementById("gb");
gb.style.right = (30-gb.offsetWidth).toString() + "px";
</script>

To set the distance from the top position, please change the value of top: 50 px suit your taste.

Please try, and safely enjoy your new widget.
»»  read more

Friday, June 5, 2009

jQuery Scroll to Top Control v1.1

A blog page / site will sweep down. Moreover, the articles you write on the blog / site does not use Readmore. Of very tired when we have to scroll manually. If the page blog / site you lengthy, it's a good idea to provide viewers with an easy way to quickly / automatically scroll back to the top of the page.

Adding script with jQuery Scroll to Top Control v1.1, the control will display a stationary in the lower right corner of the window carefully when clicked on the page Scrolls back to the top. At times this practice, I use the arrow icon that I attach the script at jQuery before uploading Geocities.yahoo.com.

Please note that in addition to displaying stationary control, you can also specify a random anchor link on the page with the href value of special (ie: # top), which when clicked and the script Scrolls back to the top of the page.

Scroll to the bottom of the page (at least 100 pixels) to view a "Back to the Top" controls appear at the bottom right window, as in the Ayomaos this.

If you do not want to modify this script, then you just copy the code below:

<script type='text/javascript' src='http://ajax.googleapis.com/ajax/libs/jquery/1.3.2/jquery.min.js'></script>

<script type='text/javascript' src='http://www.geocities.com/nataludin5/scrolltopcontrol-1.js'>

/***********************************************
* Scroll To Top Control script- © Dynamic Drive DHTML code library (www.dynamicdrive.com)
* This notice MUST stay intact for legal use
* Visit Project Page at http://www.dynamicdrive.com for full source code
***********************************************/

</script>

Then add the script after <head>


If you are not satisfied with my modifications, you can adjust various things, such as the amount of time the backup script is required to scroll to the top, with the duration of fade in / out effect to control in scrolltopcontrol.js file, here is the relevant section to be modified :
setting: {startline:100, scrollto: 0, scrollduration:1000, fadeduration:[500, 100]},
controlHTML: '<img src="up.gif" style="width:24px; height:24px" />', //HTML for control, which is auto wrapped in DIV w/ ID="topcontrol"
controlattrs: {offsetx:15, offsety:15}, //offset of control relative to right/ bottom of window corner
anchorkeyword: '#top', //Enter href value of HTML anchors on the page that should also act as "Scroll Up" links
For "controlHTML", you can enter any HTML you want displayed as a control, but it must be something simple, such as an<img>, or even just plain text. Sample the following anchors in the HTML page also scroll the page back to top:

<a href="#top">Back to Top</a>

If you are not clear with my explanation, please visit at: http://www.dynamicdrive.com/dynamicindex3/scrolltop.htm
»»  read more

Saturday, May 30, 2009

Related posts widget with photo thumbnails


Some thoughts or ideas of innovative, much needed in managing the blog / site. The idea here is, how do you take action to create a tactics to attract visitors to visit your blog, so this could increase traffic.
One way will I study is to add a summary of articles that have been made before, the form of a widget and placed at the end of writing the article. But this widget is not related to the articles that are readable, which is often found on blogs / sites that have been there, called the Related Articles. Okay, we will discuss step by step how to create this widget.

I find this widget from Linkwithin.com (http://www.linkwithin.com). The widget is free and ad-free. It takes a minute to get the widget up and running on your blog, no signup required! LinkWithin is a widget that links to related stories from your archive under each story on your blog.
We retrieve and index all stories from your blog archive, not just recent stories, making them accessible to new or casual readers of your blog who would not otherwise encounter them.
The widget links to stories that are relevant and interesting to readers of a particular story, keeping them engaged with your blog, and increasing your traffic.

If you are interested, you are only prompted for the email address, link blog, Platform and check the box in front of "My blog has light text on a dark background" (If your blog with a dark background), then click the "Get Widget"

Then you will be taken on the "Install Widget on Blogger"

1. Click INSTALL WIDGET to open Blogger in a new window, and follow steps 2 and 3 in that window. Please login if necessary.

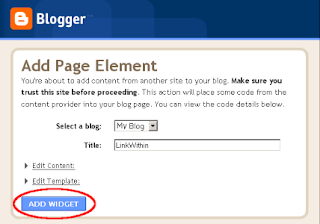
2. Select a blog if you have more than one, then click on Add Widget.


3. Click on Save. And you're done! The widget should now appear on your blog, located at the end of the articles have been written.

For the blog that have a "Main-Wrapper" is wide, and a template that is used not Magazine, the widget is not found obstruction. Because automatically, Linkwithin of widgets appear with three pictures, complete with caesura article, which does not take much space from the Main-Wrapper.

For the type of template used shaped "Magazine Template." Installation of Widgets LinkWithin, very problematic because it seems that the widget through a column that is the right of the MAIN-Wrapper. This also applies to blogs that have added "Readmore" in each of their articles. So that it is not harmonious, and the main blog page seems disorganized.
But you don't worry, I have found the solution.

After you implement the third step, then immediately to the Layout | Page Elements and click the Edit "LinkWithin Gadget."


Script code that appears is as follows:
<script>
var linkwithin_site_id = 19881;
(function () {
var elem = document.createElement('script');
elem.type = 'text/javascript';
elem.src = 'http://www.linkwithin.com/widget.js?rand=' + Math.random();
document.getElementsByTagName('head')[0].appendChild(elem);
})();
</script>
<a href="http://www.linkwithin.com/"><img alt="Blog Widget by LinkWithin" style="border: 0" src="http://www.linkwithin.com/pixel.png"/></a>

Then copy the script code in Notepad.

After that, you click on Edit HTML, and then check the "Expand Widget Templates" .
Use Control F to search for the code:
<b:widget id='HTML5' locked='false' title='LinkWithin' type='HTML'>
<b:includable id='main'><data:content/></b:includable>
</b:widget>

Then copy the script code in Notepad. After you copy the two scripts above, please remove the code, do confirm and save.
Of the two scripts that you copy, you can change into a single script that appear similar to this:

<b:if cond='data:blog.pageType == "item"'>
<div class='widget-content'>
<div expr:id='&quot;main&quot; + data:content.id'><data:content/></div>
<script type='text/javascript'>
var linkwithin_site_id = 19881;
(function () {
var elem = document.createElement('script');
elem.type = 'text/javascript';
elem.src = 'http://www.linkwithin.com/widget.js?rand=' + Math.random();
document.getElementsByTagName('head')[0].appendChild(elem);
})();
</script>
<a href="http://www.linkwithin.com/"><img alt="Blog Widget by LinkWithin" style="border: 0" src="http://www.linkwithin.com/pixel.png"/></a>
</div>
</b:if>

After that, you click on Edit HTML, and then check the "Expand Widget Templates" .
Use Control F to search for the code:

<div style='clear: both;'/> <!-- clear for photos floats -->

Add the code that the script has been modified, before the code above.


Hopefully helpful
»»  read more

Monday, May 25, 2009

Adsense permanent, in the Credit-footer

When you visit on this blog, try to look carefully. Especially on the bottom, from Ayomaos this. In the right corner of the part, you can see the Adsense with size 468px X 60px installed permanently. Meanwhile in the bottom left corner, is the creator of the template Ayomaos and some information associated with the template AYOMAOS. I call this section with the name of Credit-Footer.

This step is also a part of how to manage your blog to make money from Google Adsense. Adding code from Adsense, do not have to be on the sidebar, in the article, or in part before / after the header. We can add Adsense on where we want, which is not in violation of rules set by Google.
As I have been doing, that is I have put Adsense at the bottom of Ayomaos, with a fixed position. In the sense that, at the time Ayomaos visitors do scroll, Adsense does not change position and do not disappear.


Are you interested in the steps I have been doing on Ayomaos? Try to follow the step by step, how to install credit-footer in your blog.
The first step, please backup your template. Do not tick the "Expand Widget Templates"
Then search the code ]]></ b: skin>. Add the following code before ]]></ b: skin>.

#credit-footer p.credit {
float: right;
padding-right:10px;
line-height: 1.2;
height: 100%;
vertical-align: bottom;
}

#credit-footer p {
float: left;
margin: 0px;
padding: 7px 10px 5px 5px;
vertical-align: bottom;
line-height: 1.2;
}
#credit-footer a {
color: #FFFFFF;
}
#credit-footer {
align: center;
position: fixed;
border-top: 3px solid #ffffff;
background: #000000;
left: 0px;
text-align: left;
width: 100%;
color: #FFFFFF;
font-family: Verdana;
font-size: 11px;
bottom:0;
}

Steps that you should do next is find the code </ body>.
Add the following code before the </ body>.

<div id='credit-footer'>
<p>
&lt;p&gt;<data:blog.pageTitle/><br/>Copyright:19052009 | &lt;a href=&#39;http://www.nataludin.com&#39;&gt;www.nataludin.com&lt;/a&gt; | <a href='#header'>Top</a><br/>Has been modified by &lt;a href=&#39;http://www.nataludin.com&#39;&gt;NATALUDIN.COM&lt;/a&gt;<br/> Thank&#39;s for : Blogger | Photobucket | Picassa</p>

<p class='credit'>
&lt;script type=&quot;text/javascript&quot;&gt;&lt;!--
google_ad_client = &quot;pub-7181952237540333&quot;;
google_ad_host = &quot;pub-1599271086004685&quot;;
/* 468x60, created 11/26/08 */
google_ad_slot = &quot;6911967720&quot;;
google_ad_width = 468;
google_ad_height = 60;
//--&gt;
&lt;/script&gt;
&lt;script
src=&quot;http://pagead2.googlesyndication.com/pagead/show_ads.js&quot; type=&quot;text/javascript&quot;&gt;
&lt;/script&gt;
</p></div>

Please change your own according to your taste, of course you also need to change the adsense code samples that have been there, with your own adsense code.
With this tutorial, I hope can help in maximizing efforts to increase our adsense earnings.
»»  read more

Friday, May 22, 2009

Place Meta Tags on Blogger

Meta tags are how important the information on Search Engine, a page of information about the website, There are many meta tags appropriate with the standard HTML 4.0 from the World Wide Web Consortion, but actually genuinely used by the search engine only description, keyword, and robots.

The Meta Description Tags

The Meta description tag is used to give an overview about the contents of your web page. Size is recommended no more than 200 characters. And try that this description can be a sentence that is located in the early pages of the web page.

Some search engines such as Google and Nothern Light does not use meta description tags as search results. They use is the beginning of the sentence on the page.
That is why I recommend that you use the contents of the meta description tag as a sentence opener.

The Meta Keywords Tag

The Meta Keywords Tag is very important presence, because determining what keywords to find the web page on the search engine. Basic format of the meta tag is a keyword as follows:

<meta name="keywords" content="keyword1 KEYWORD2 keyword3 ...">

or who have also written with a comma separator:

<meta name="keywords" content="keyword1, keyword2, keyword3, ...>

Both work the same and there is no impact on the search engine. The purpose of use commas keywords that are easier to read. To note here is do not repeat a word more than 3 times, because it will be considered spamming. Examples of meta tag keywords that are wrong:

<meta name="keywords" content="domain, free domain, best domain, expired domain">

Seen here that the word "domain", repeated more than 3 times.

That is not less important the keyword is not the keyword that does not make a connection with the content of your web page.


The Meta Robots Tags

The main objectives of robots meta tags is to define a web page which can index by a spider and web pages which do not. Tags This is a very useful one, especially if something website uses frames to navigate. Of course we do not want to display menus in the frame to be read by search engines.
Basic format of the robots meta tag is as follows:

<meta name="robots" content="index | noindex | follow | nofollow">

For example, if you want to read the spider main page, and all the links that have then add the following:

<meta name="robots" content="index follow">

With this command, the spider will index your main page and schedule to record the pages that can be searched through a hyperlink (<a href="">).

This command will instruct spider that does not record or track an existing link on a web page.

<meta name="robots" content="noindex nofollow">

Then, how to install Meta Tags on Blogger:

To install the Meta tags diBlogger is quite simple, first go to Edit HTML and then copy and paste the code below, the code meta tags are usually placed under the code

<title> <data:blog.pageTitle/> </ title>

<meta content='write your description' name='description'/>
<meta content = 'keyword1 keyword2 keyword3 ...' name = 'keywords' />
<meta content='INDEX, FOLLOW' name='ROBOTS'/>
»»  read more

Thursday, May 14, 2009

Adding Gadget Video / Music

A blog does not necessarily full time, if not added to the gadget, music or video.
Moreover, the gadget is always a video clip presenting the latest and most popular. The problem, by adding this gadget, loading of the blog may be quite heavy.
If you want to install video gadgets, such as those in this blog, I try to share with you. Please add the code below, on your blog's sidebar.


<center><br/><img border="1" width="210" src="http://img401.imageshack.us/img401/7652/eqizqu6.gif" height="50"/><br/><embed allowscriptaccess="always" width="210" src="http://kodelagu.net/codeplayer.swf" height="300" allowfullscreen="true" flashvars="height=300&width=210&file=http://kodelagu.net/generator.xml&config=http://kodelagu.net/random.swf&searchbar=false"/><br/></embed></center>

You can resize the width and height of this gadget, adjusted to the size of your blog's sidebar.

Hopefully helpful
»»  read more
Adsense Indonesia ads ads ads

Recent Comment

Follower

My friends

[A] • Abryan • Agnoe • Anied • Antiqueall [B] • bidikCOM • Budiawan H [C] • Catalog Tutorial [D] • Destiny • Djemari Ijal • Dorothy L [E] [F] [G] • Gemmasnewworld [H] • HEALTHINFO@EarthyMe [I] • iEn Muncet • Ihsan's Blog • Ikma Malaysia [J] [K] [L] [M] [N] • Nuranuraniku [O] • O-Range [P] [Q] [R] • Robbie's Blog [S] [T] • tiriBC • True Pillager [U] [V] [W] [X] [Y] [Z]